Dive into a piece of New York baking history. The Brooklyn Blackout Cake is a towering tribute to chocolate, originally created by Ebinger’s Bakery. This version features three exceptionally moist and tender devil’s food cake layers, each soaked with a simple syrup to ensure maximum moisture.
The layers are sandwiched and frosted with a uniquely silky and rich chocolate pudding buttercream, a frosting that tastes like pure chocolate cream.
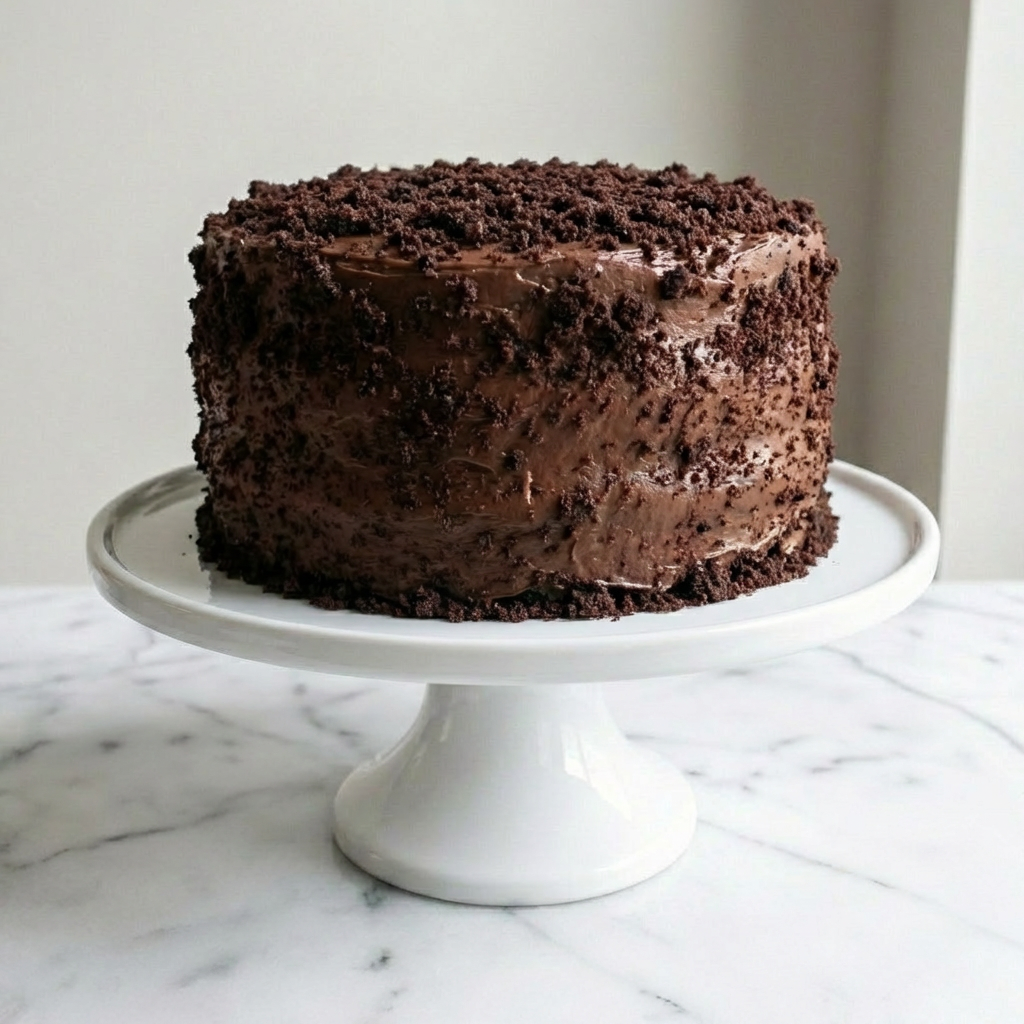
The final, signature touch is a complete coating of fine chocolate cake crumbs, creating a stunning matte-black exterior with an incredible textural contrast to the soft, lush interior. It’s a project cake, but each glorious, decadent bite is a reward worth the effort.
The Anatomy of an Icon: Crumb, Soak, and Pudding Frosting
This cake achieves its legendary status through three deliberate techniques. First, the devil’s food cake uses both cocoa powder and hot coffee to create a deep, complex chocolate flavor and a velvety, tight crumb.
Second, a simple syrup soak brushed on the cake layers locks in moisture and adds a subtle flavor base, a crucial step for a cake that improves with time. The star is the chocolate pudding buttercream. Unlike a standard American buttercream, it begins with a cooked pudding base of milk, sugar, cocoa, and cornstarch. When cooled and beaten into creamed butter, it creates a frosting that is less sweet, intensely chocolatey, and has a luxurious, almost silken texture that mimics the cake’s original custard filling.
Finally, the crumb coat isn’t just decorative—it seals in the frosting and provides the signature rustic, all-chocolate appearance that gives the cake its “blackout” name.

Instructions
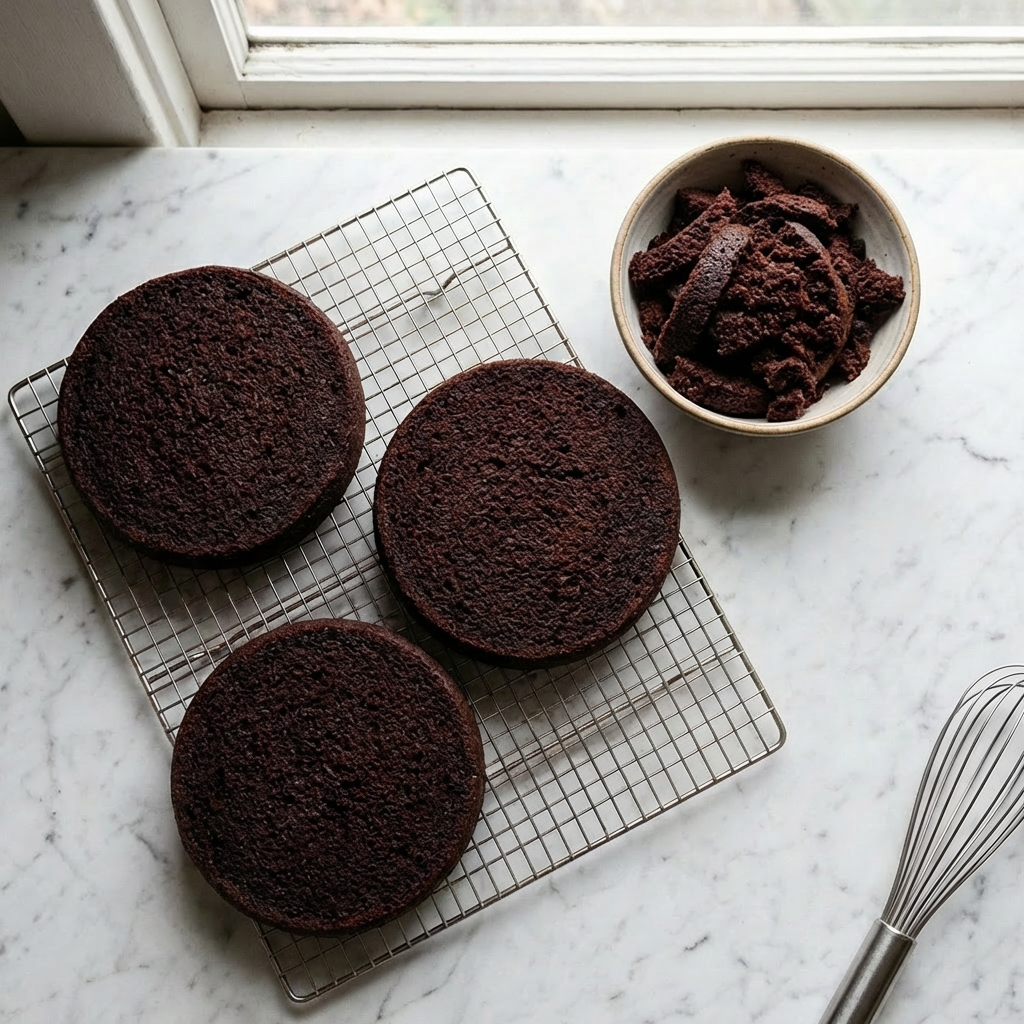
The Baked & Cooled Cake Layers (Result of Baking & Leveling)
Preheat oven to 350°F (175°C). Grease and line three 8-inch round cake pans. Sift dry ingredients into a large bowl. Whisk wet ingredients in another. Combine until smooth (batter will be thin).
Divide evenly among pans. Bake 25-30 minutes until a toothpick comes out clean. Cool completely in pans, then turn out. Level the domed tops with a serrated knife; reserve trimmings for crumbs.
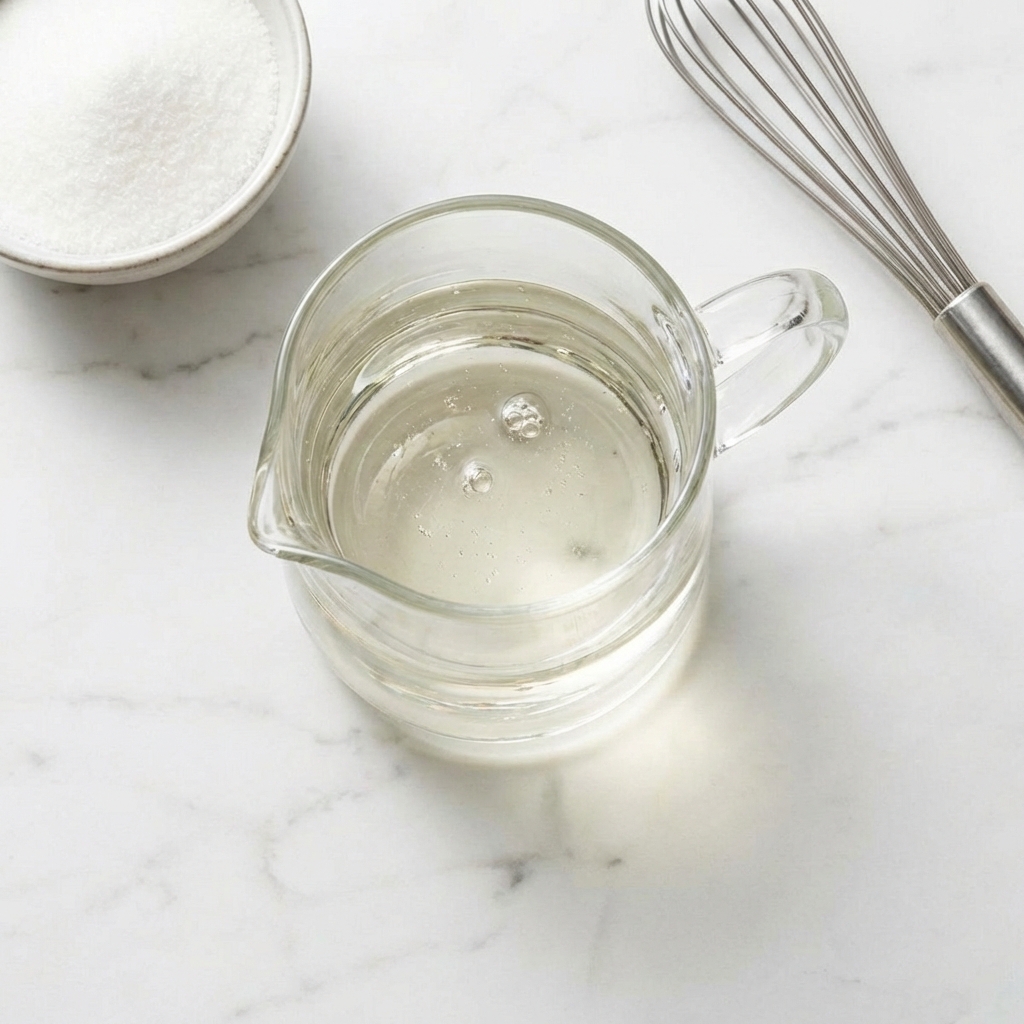
The Prepared Simple Syrup (Result of Syrup Making)
In a small saucepan, combine water and sugar. Bring to a simmer, stirring until sugar dissolves. Remove from heat and let cool completely. Set aside with a pastry brush.
The Cooked Chocolate Pudding Base (Result of Pudding Cook)
For the frosting: In a medium saucepan, whisk sugar, cocoa, cornstarch, and salt. Gradually whisk in milk until smooth. Cook over medium heat, whisking constantly, until mixture thickens, comes to a boil, and bubbles for 1 minute.
Remove from heat. Stir in chopped chocolate and vanilla until smooth. Press plastic wrap directly on the surface and refrigerate until completely cold, about 2 hours.
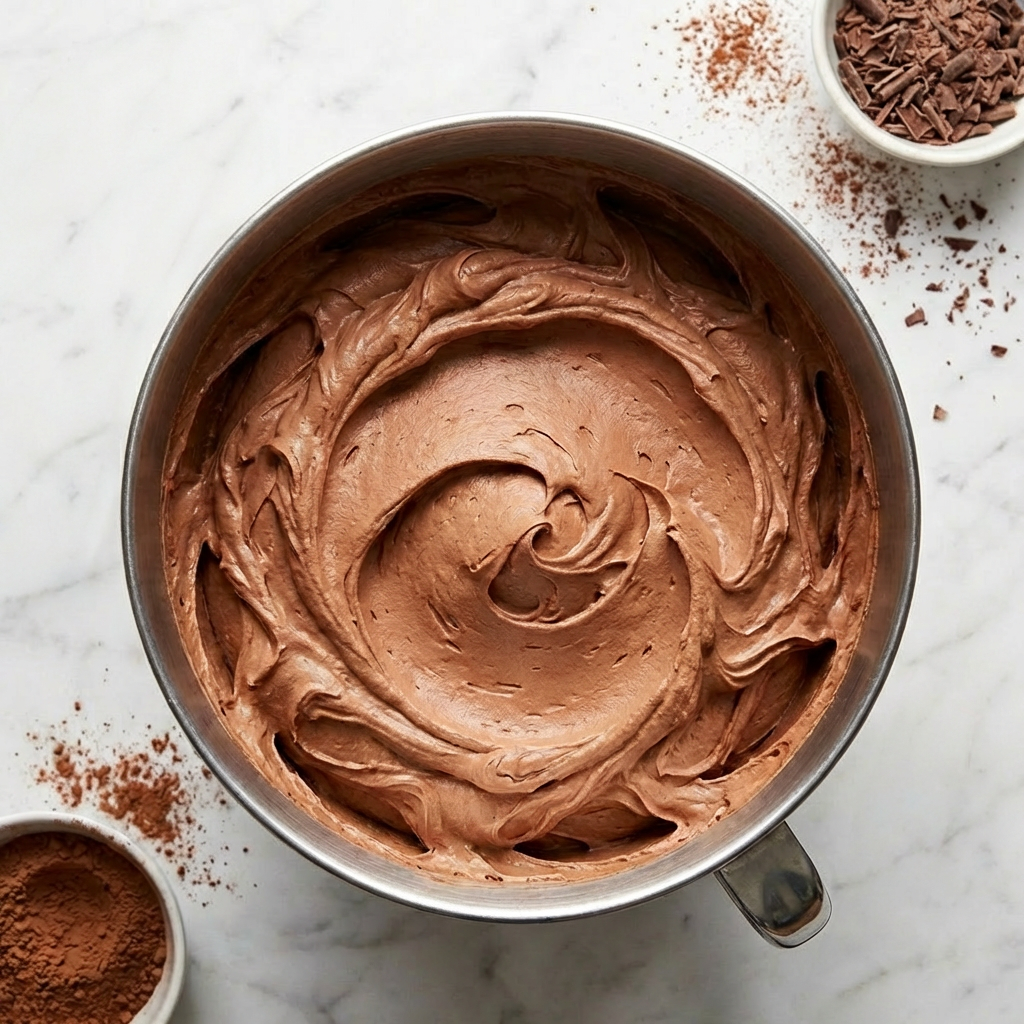
The Finished Pudding Buttercream (Result of Beating)
In a stand mixer with the paddle, beat the softened butter on medium speed until very smooth and creamy, about 3 minutes. With the mixer on low, add the cold chocolate pudding a few spoonfuls at a time, fully incorporating each addition before adding more.
Once all pudding is added, scrape bowl and beat on medium-high for 3-4 minutes until frosting is light, fluffy, and uniform. It will be the color of milk chocolate and have a silky, spreadable consistency.
The Assembled & Crumb-Coated Cake (Result of Assembly)
Place one cake layer on a serving plate. Brush with simple syrup. Spread with ¾ cup frosting. Repeat with second layer, syrup, and frosting. Add final layer, brush with syrup. Apply a thin “crumb coat” of frosting over the entire cake to seal in crumbs.
Refrigerate for 20 minutes. Apply a final, thicker layer of frosting to the chilled cake. Press the reserved cake crumbs firmly and completely onto the top and sides of the frosted cake until no frosting is visible.
Serve & Store
For best texture, let cake sit at cool room temperature for 1 hour before slicing. Use a hot, dry knife for clean cuts. Store covered in the refrigerator for up to 5 days. Let slices come to room temperature for 20 minutes before serving.
Pro-Tips for a Legendary Re-Creation
- Dutch-Process Cocoa is Essential: Its deeper color and mellower flavor are traditional and create the iconic dark hue.
- Don’t Skip the Syrup: This soak guarantees a supremely moist cake that stays fresh for days.
- Pudding Must Be Cold: The pudding base must be completely chilled before adding to the butter, or it will melt the butter and break the emulsion, creating a greasy frosting.
- Butter Temperature is Key: Use butter that is softened but still cool—your finger should leave an indent but not sink in easily.
- Crumb Technique: For easiest application, place the frosted cake on a baking sheet. Hold a handful of crumbs in your hand and gently press and toss them against the sides. Let excess fall onto the baking sheet to be reused.
- Plan Ahead: This is a two-day cake. Bake the layers and make the pudding base one day; assemble and frost the next. The flavors mature beautifully.
The Brooklyn Blackout Cake isn’t just a dessert; it’s a chocolate monument.