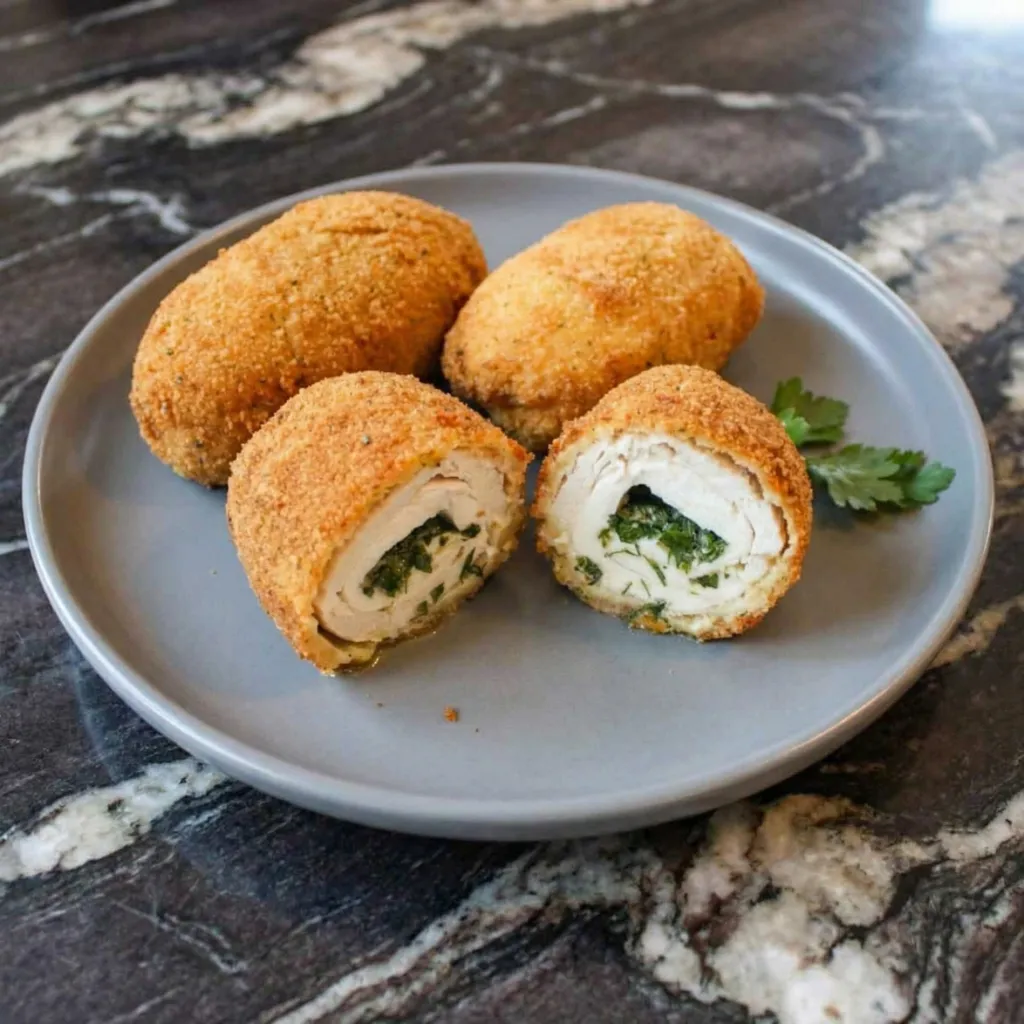
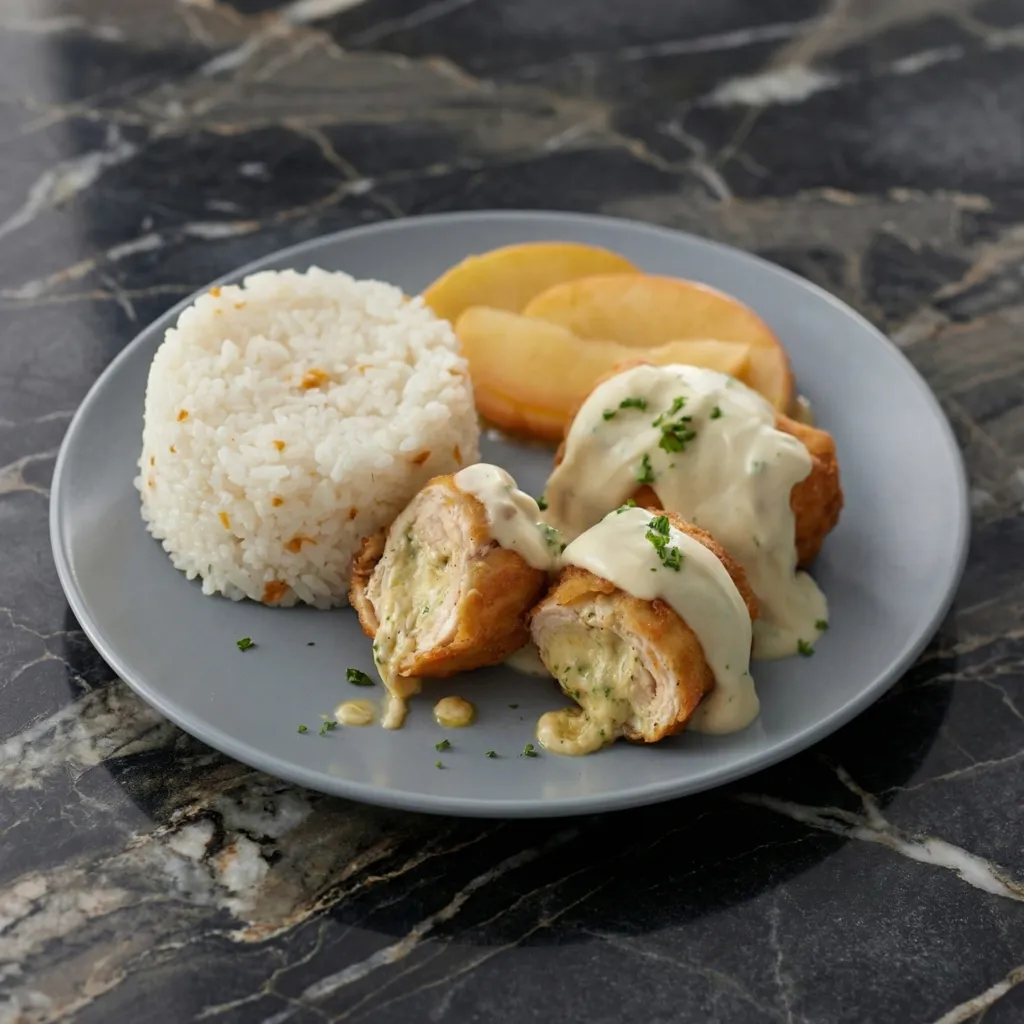
There are chicken dishes, and then there’s Chicken Kiev—a culinary masterpiece that combines a crispy, golden crust with a juicy, tender interior, all hiding a secret pocket of garlic-herb butter that erupts with flavor at the first cut.
This Eastern European classic has graced dinner tables and restaurant menus for generations, and for good reason. The contrast of textures—the shattering crunch of the panko coating, the succulent chicken, the molten butter sauce—is pure magic. While Chicken Kiev may seem like a project, the technique is straightforward: pound, roll, chill, bread, fry.
With a little patience and attention to detail, you can create this showstopping dish at home. Serve with roasted potatoes or steamed vegetables to soak up every last drop of that glorious butter sauce.

Instructions
Make the Garlic-Herb Butter
In a small bowl, combine the softened butter, minced garlic, parsley, chives, dill (if using), salt, pepper, and lemon zest. Mix until well combined. Spoon the butter onto a piece of plastic wrap and roll into a log about 1 inch in diameter. Twist the ends to seal. Refrigerate for at least 2 hours, or until completely firm.
Prepare the Chicken
Place one chicken breast between two sheets of plastic wrap or parchment paper. Using a meat mallet or rolling pin, pound to an even thickness of about ¼ to ½ inch. Season both sides with salt and pepper. Repeat with remaining chicken breasts.
Assemble the Kiev
Unwrap the chilled butter log and cut into 4 equal pieces (about 1 tablespoon each). Place one piece of butter in the center of each pounded chicken breast. Fold the sides of the chicken over the butter, then roll tightly from the bottom to form a sealed package.
Ensure the butter is completely encased—any gaps will cause leakage. Wrap each rolled breast tightly in plastic wrap and refrigerate for at least 1 hour, or up to 24 hours. This chilling step is essential.
Set Up the Breading Station
Place the flour in one shallow dish, the beaten eggs in a second dish, and the panko breadcrumbs (mixed with Parmesan if using) in a third dish. Remove the chicken from the refrigerator.
Working one at a time, dredge each breast in flour, shaking off excess. Dip into the beaten eggs, allowing any excess to drip off. Finally, coat thoroughly in panko, pressing gently to adhere. Return the breaded chicken to the refrigerator for 30 minutes to set the coating.
Fry the Chicken
In a large, heavy-bottomed skillet or Dutch oven, heat ½ inch of oil to 325°F to 350°F (165°C to 175°C). Carefully add the chicken breasts (work in batches if needed). Fry for 3 to 4 minutes per side, until deep golden brown and crispy. The chicken should not be fully cooked through at this stage.
Finish in the Oven
Preheat oven to 375°F (190°C). Transfer the fried chicken to a baking sheet. Bake for 10 to 12 minutes, until the chicken reaches an internal temperature of 165°F (74°C). This ensures the chicken cooks through without the butter leaking or the crust burning.
Serve
Let the Chicken Kiev rest for 3 to 5 minutes. Serve immediately with lemon wedges, fresh parsley, and your choice of sides. Encourage diners to cut into the chicken to release the glorious butter sauce.
This Chicken Kiev is the ultimate special-occasion dish—crispy, buttery, and utterly unforgettable.