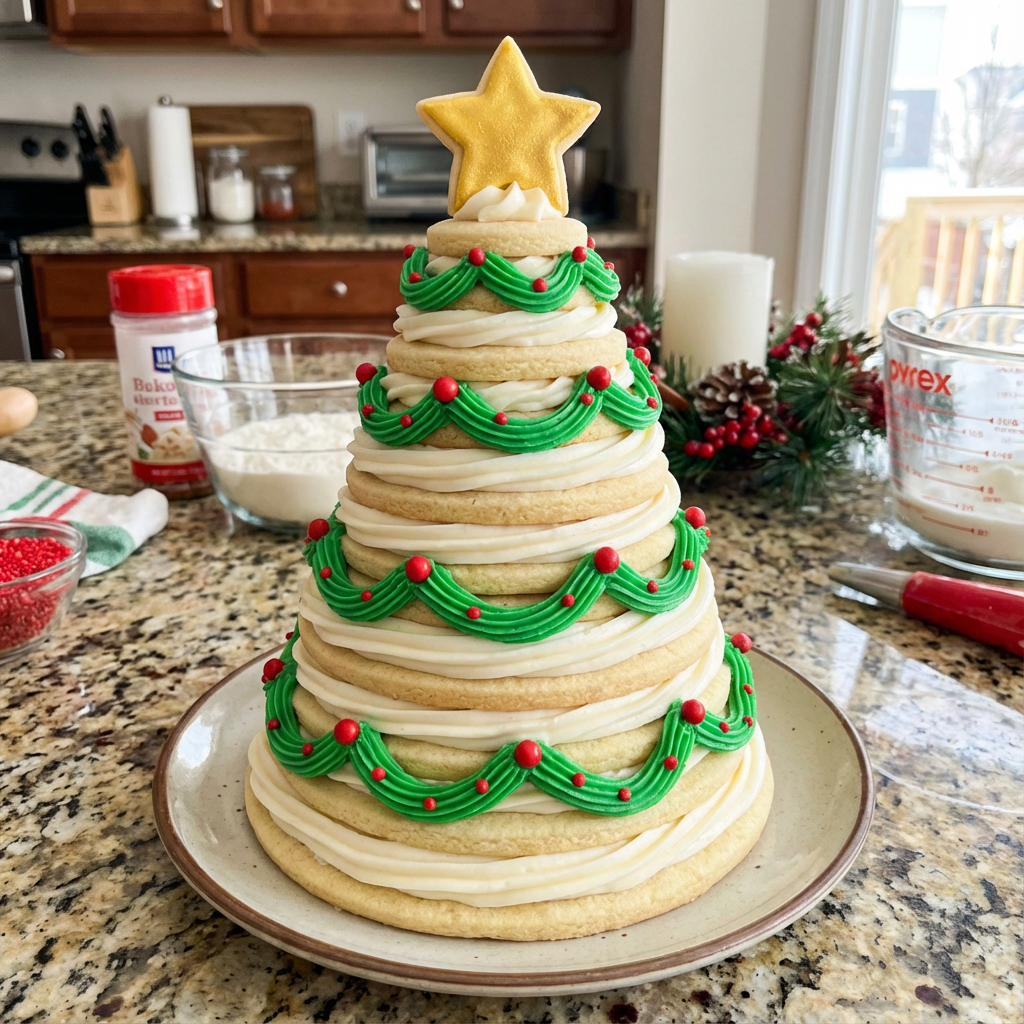
The holiday season is filled with wonders, but few things capture its magic quite like an edible centerpiece that doubles as dessert. Imagine a miniature, delicious Christmas tree gracing your table, made not of pine needles, but of tender, buttery sugar cookies and clouds of tangy-sweet cream cheese frosting. This Cookie Tree Stack is that magical creation. It’s a baking project that feels more like a festive craft, one that invites collaboration and results in something truly spectacular.
The concept is elegantly simple: bake cookies in graduating sizes, then stack them with frosting to create a tree shape. Yet, the final effect is breathtaking—a striped, tiered tower that becomes a canvas for your family’s creativity. Whether you go for a classic, elegantly decorated tree or a wildly colorful one covered in sprinkles, this edible masterpiece is guaranteed to be the most talked-about (and eagerly eaten) part of your holiday spread. It’s a recipe that builds memories in layers, both literal and figurative.
The Architecture of an Edible Tree: Stability & Flavor
Building a cookie tree that stands tall and proud (and doesn’t topple when sliced) requires a thoughtful blueprint. The foundation is a sturdy, roll-out sugar cookie that bakes flat and retains its shape without excessive spreading. This recipe uses a balance of butter for flavor and a touch of cornstarch for a soft, yet firm, bite that can support weight. The cookies are cut using nested round cutters or even just a knife and bowls as templates to create 6-8 graduated sizes.
The “mortar” holding this sugary architecture together is a thick, stable cream cheese frosting. The cream cheese provides a delightful tang that cuts the cookie’s sweetness, while powdered sugar gives it structure. The key is to beat the frosting just until smooth and thick; overbeating can make it too soft. A thin, even layer between each cookie acts as both glue and a delicious filling. For the grand finale, the entire tree is given a rustic “crumb coat” of frosting, mimicking snow, before the final decorations are added. This method ensures every slice delivers a perfect ratio of cookie to frosting in every bite.
Ingredients
For the Sugar Cookies:
- 3 cups all-purpose flour
- 1 teaspoon baking powder
- ¼ teaspoon salt
- 1 cup unsalted butter, at room temperature
- 1 cup granulated sugar
- 1 large egg, at room temperature
- 2 teaspoons pure vanilla extract
For the Cream Cheese Frosting:
- 8 oz full-fat cream cheese, softened
- ½ cup unsalted butter, softened
- 4 cups powdered sugar, sifted
- 2 teaspoons pure vanilla extract
- Pinch of salt
For Decoration:
- Green gel food coloring
- Assorted sprinkles, sanding sugar, mini M&Ms, or red hots
- Optional: 1 small star-shaped cookie for the topper
Instructions
1. Make & Chill the Dough: In a medium bowl, whisk together flour, baking powder, and salt. In a large bowl, beat butter and sugar until light and fluffy. Beat in egg and vanilla. Gradually add dry ingredients, mixing just until combined. Divide dough in half, shape into discs, wrap in plastic, and chill for at least 2 hours (or up to 3 days).
2. Bake the Cookies: Preheat oven to 350°F (180°C). Line baking sheets with parchment. On a floured surface, roll one dough disc to ¼-inch thickness. Using nested round cutters, bowls, or a knife and templates, cut cookies in graduating sizes. You’ll want 1-2 of each size, starting from about 5 inches in diameter down to 1 inch. Re-roll scraps. Place cookies on prepared sheets and bake for 9-12 minutes (smaller cookies less, larger cookies more) until set and just barely golden at the edges. Cool on sheets for 5 minutes, then transfer to a wire rack to cool completely.
3. Make the Frosting: Beat softened cream cheese and butter together until completely smooth. Gradually add sifted powdered sugar, vanilla, and salt. Beat on low until incorporated, then on medium-high until thick and fluffy. If frosting seems too soft, chill for 15-20 minutes.
4. Build the Tree: Place your largest cookie on a serving plate or cake stand. Spread a thin, even layer of plain frosting on top. Carefully place the next largest cookie on top, centering it. Repeat, using all cookies from largest to smallest, ending with the tiniest cookie. Use a small offset spatula to spread a thin layer of the remaining plain frosting over the entire stacked tree to create a “crumb coat.” This seals in crumbs and gives a snowy look. Chill for 20 minutes to set.
5. Decorate: Reserve a small amount of plain frosting for the star topper, if using. Color the remaining frosting with green gel food coloring. Fit a piping bag with a small round or star tip and fill with green frosting. Pipe garland swirls around each cookie tier. Immediately decorate the “garland” with sprinkles or candies as ornaments. Attach a star cookie to the top with a dab of reserved frosting. Let set for at least 1 hour before slicing.
6. To Serve: Use a sharp knife to slice wedges, just like cutting a cake, revealing the beautiful layered stripes inside.
A Festive Project for Lasting Memories
This cookie tree is meant to be fun, not perfect. Let kids help with sprinkling decorations. If you don’t have round cutters, you can use a knife and trace bowls or plates onto parchment paper as guides. For the cleanest slices, use a serrated knife and a gentle sawing motion. The unfrosted cookies can be baked and frozen weeks ahead; the frosting can be made 2 days in advance. Assemble and decorate the day before your event. This isn’t just a dessert; it’s a holiday activity and a stunning tribute to the season’s joy, proving that the most cherished traditions are often the ones you can eat.