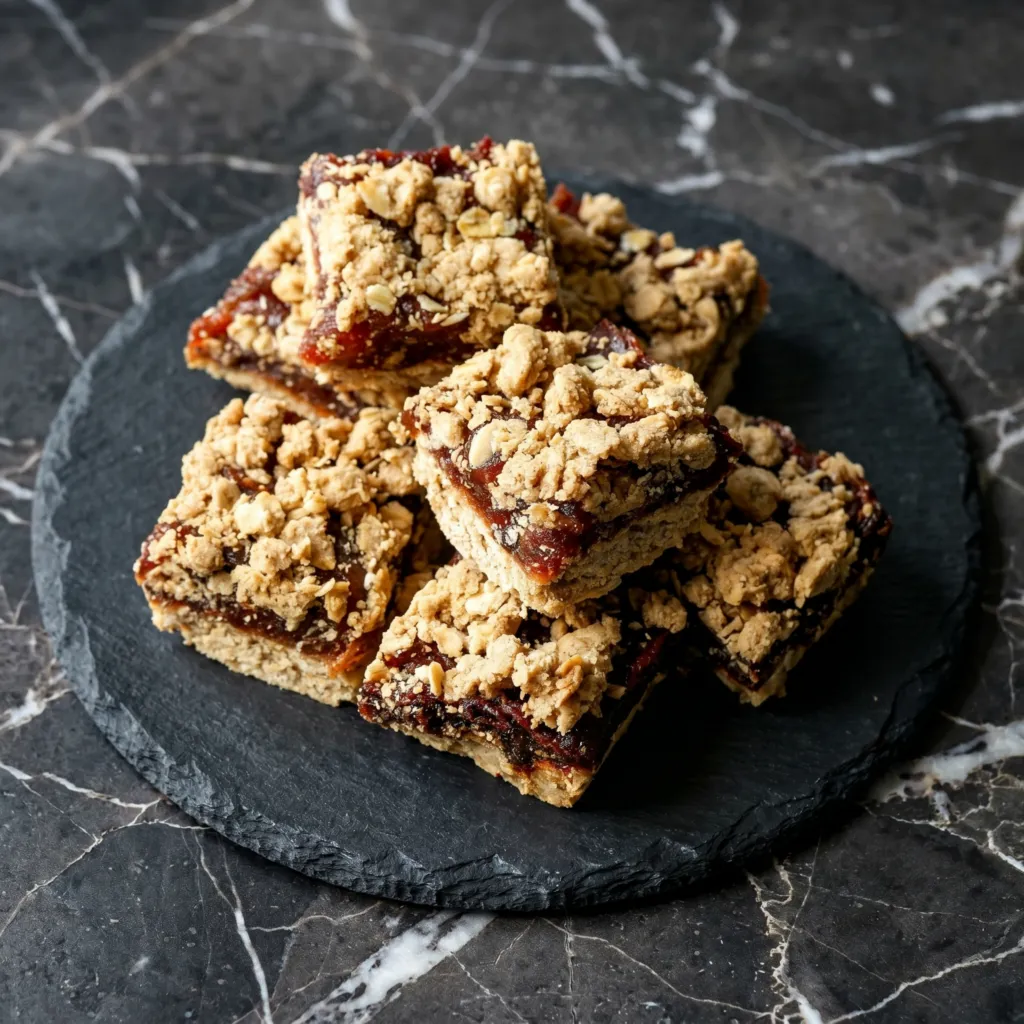
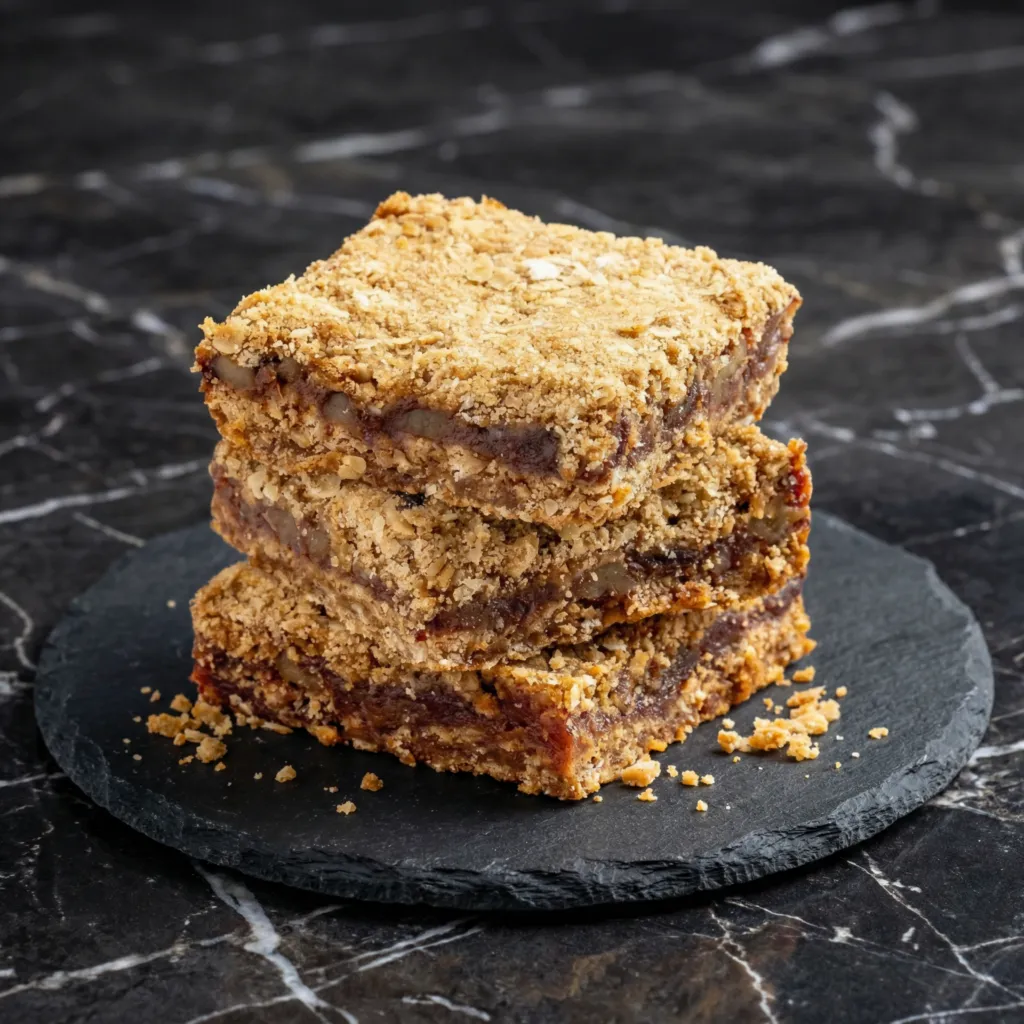
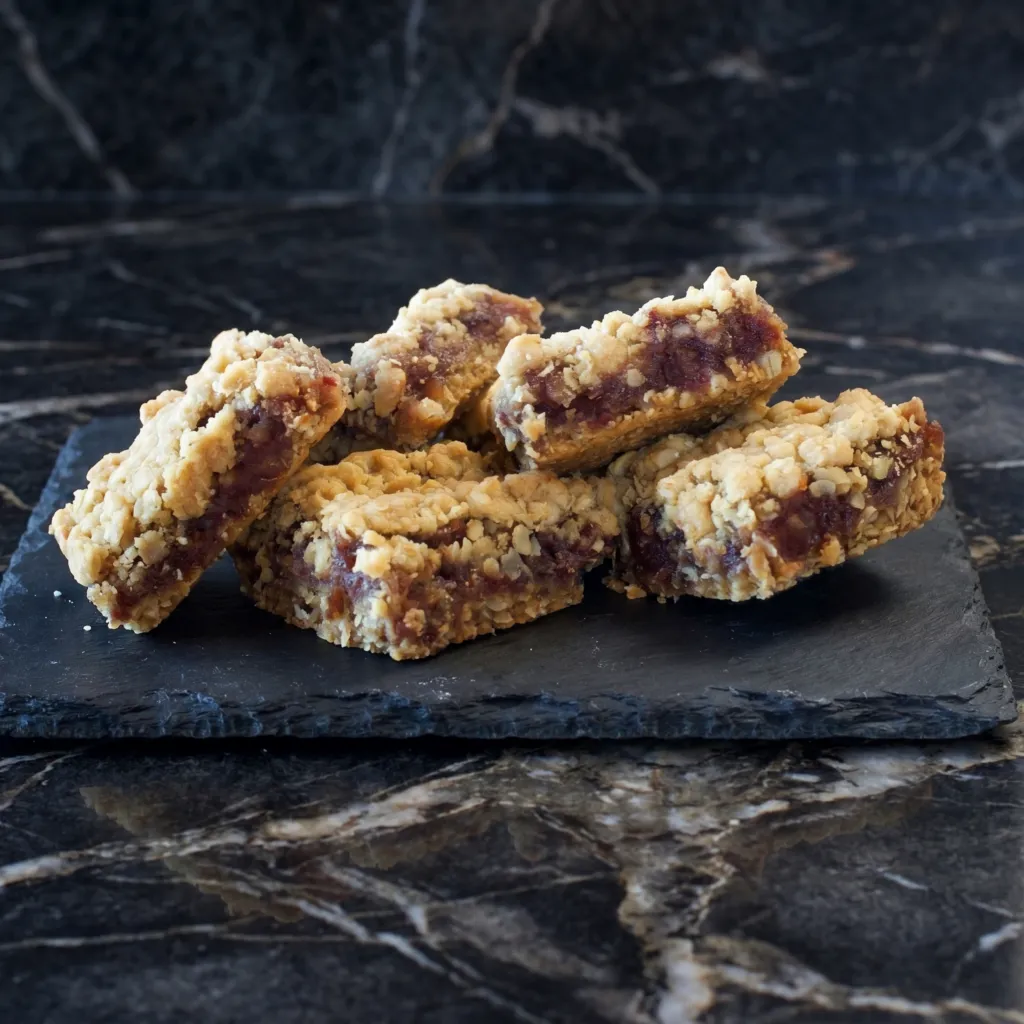
Date bars, also known as date squares or matrimonial cake, are a beloved old-fashioned treat. A buttery oat crust and crumble top sandwich a sweet, caramel-like date filling that’s simply irresistible.
The filling is made by simmering chopped dates with a little water and sugar until they form a thick, jammy paste—no fancy ingredients, just pure date goodness.
The oat crust is tender and slightly crumbly, providing the perfect contrast to the sticky, sweet filling. These bars are perfect for lunchboxes, afternoon tea, or any time you’re craving something comforting and nostalgic.
Instructions
Make the Date Filling
In a medium saucepan, combine the chopped dates, water, and sugar (if using). Bring to a boil over medium heat, then reduce heat to low and simmer, stirring occasionally, for 8-10 minutes until the dates have broken down and the mixture is thick and jammy. Remove from heat and stir in the lemon juice and vanilla. Let cool slightly.
Prep and Preheat
Preheat your oven to 350°F (175°C). Line an 8×8 or 9×9-inch baking pan with parchment paper, leaving overhang on two sides for easy removal.
Make the Oat Crust
In a large bowl, whisk together the flour, oats, brown sugar, baking soda, and salt. Pour in the melted butter and stir until well combined and the mixture resembles wet sand and clumps together.
Press the Bottom Crust
Press about half to two-thirds of the oat mixture firmly into the bottom of the prepared pan. Use the bottom of a measuring cup to press it down very firmly and evenly.
Add the Filling
Spread the date filling evenly over the bottom crust.
Add the Top Crumble
Sprinkle the remaining oat mixture evenly over the date filling, pressing gently to form a crumbly top layer.
Bake
Bake for 30-35 minutes, until the top is golden brown and the edges are bubbly.
Cool
Let the bars cool completely in the pan on a wire rack. Then refrigerate for at least 1 hour before slicing—this helps them set and makes for cleaner cuts.
Slice and Serve
Use the parchment overhang to lift the bars out of the pan. Place on a cutting board and use a sharp knife to cut into squares. Serve at room temperature.
Pro-Tips for Date Bar Perfection
- Use Medjool Dates: They’re softer and sweeter than regular dates, with a caramel-like flavor. If using drier dates, increase the water and cooking time.
- Adjust Sweetness: Taste your date filling and adjust sugar accordingly—some dates are sweet enough on their own.
- Press the Bottom Crust Firmly: This prevents it from crumbling when you slice the bars.
- Cool Completely: Date bars need to cool completely to set properly. Chilling helps even more.
- Wipe the Knife Clean: The filling is sticky—wipe your knife between cuts for clean squares.
- Make Ahead: Date bars keep well for up to a week in an airtight container and actually improve after a day.
- Freezer Friendly: These bars freeze beautifully for up to 3 months.
- Variations: Add chopped nuts to the crust or filling for extra texture.
These Classic Date Bars are chewy, sweet, and perfectly old-fashioned.