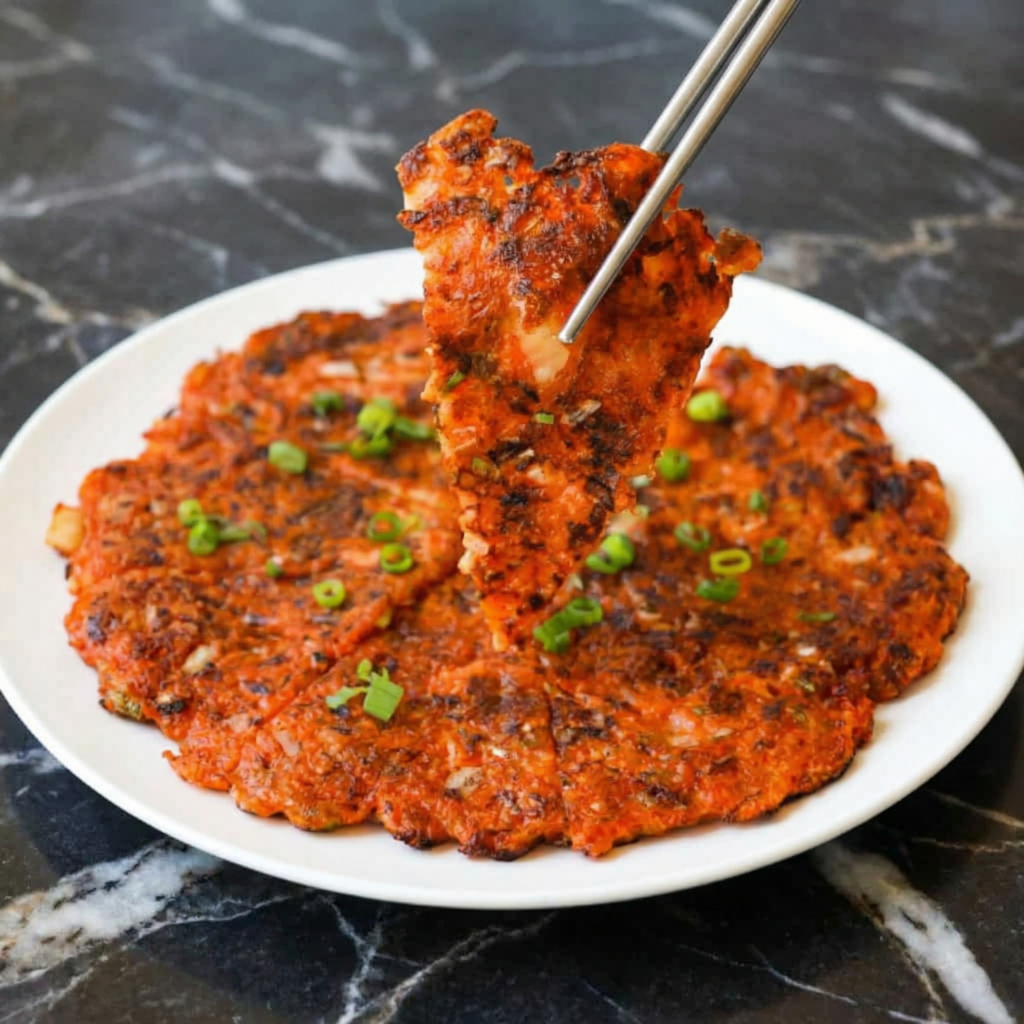

If you’ve ever craved something crispy, savory, spicy, and deeply satisfying all at once, Kimchijeon is the answer.
This beloved Korean kimchi pancake is packed with tangy fermented kimchi, a simple batter, and pan-fried to golden perfection.
It’s crunchy on the outside, tender on the inside, and bursting with bold flavor in every bite.
Kimchijeon is one of the easiest and most rewarding Korean dishes you can make at home.
It requires minimal ingredients, comes together quickly, and delivers maximum flavor.
Whether served as a snack, appetizer, or side dish, this pancake never disappoints.
Let’s break it down step by step so you can master it in your own kitchen.
Why You’ll Love This Recipe
- Crispy, golden edges
- Tangy, spicy kimchi flavor
- Simple pantry ingredients
- Ready in under 30 minutes
- Perfect for sharing
This dish is comfort food with personality.
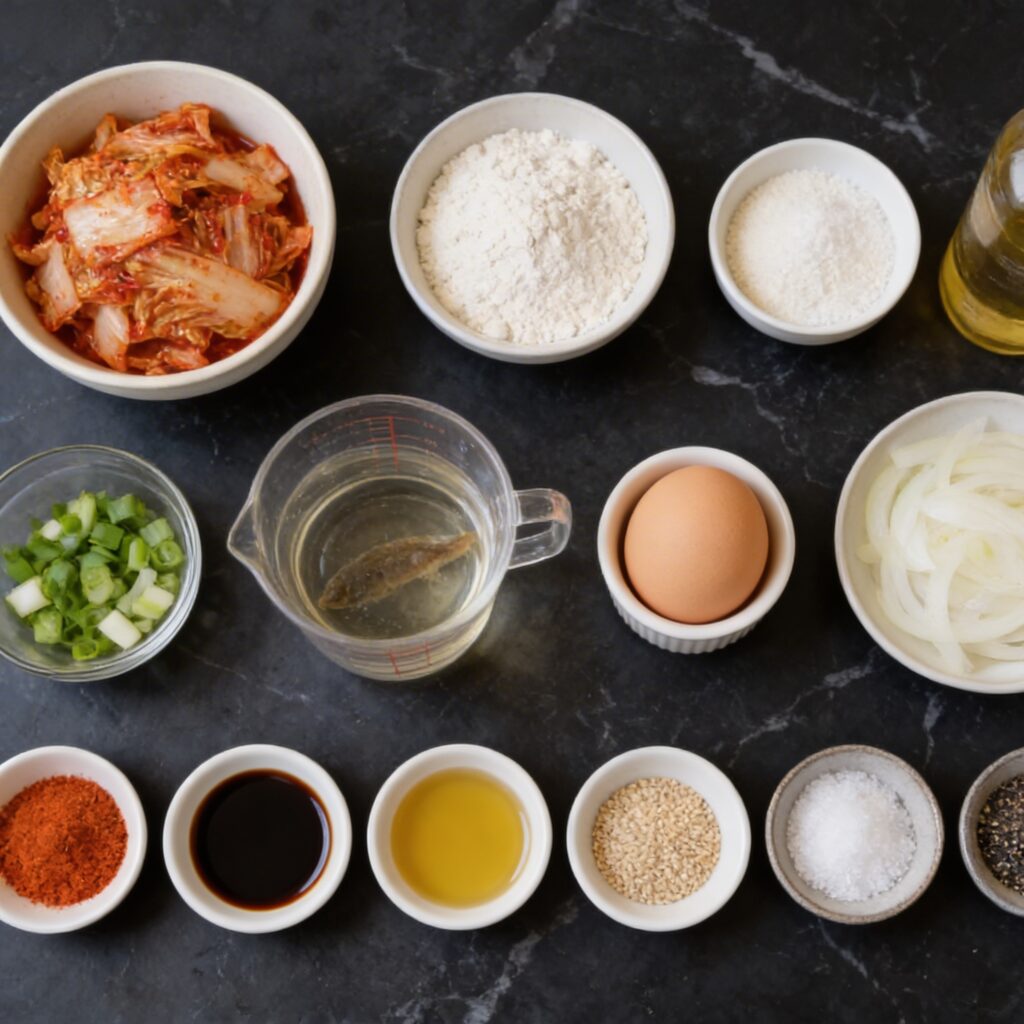
Prepare the Kimchi
Start with well-fermented kimchi. The older and tangier it is, the more flavorful your pancake will be.
Chop the kimchi into small bite-sized pieces. This helps distribute flavor evenly throughout the batter.
Reserve a couple of tablespoons of kimchi juice—this adds color, depth, and tang.
Make the Batter
In a large mixing bowl, combine flour and cornstarch.
Add cold water gradually while whisking to avoid lumps.
Stir in the egg if using.
The batter should be slightly thinner than traditional pancake batter but thick enough to coat the back of a spoon.
Add sugar and salt, adjusting based on the saltiness of your kimchi.
Add the Flavor
Fold in the chopped kimchi, kimchi juice, and sliced green onions.
Mix gently until everything is evenly incorporated.
If adding shrimp or pork belly, fold them in now.
The batter should look vibrant red-orange with visible pieces throughout.

Heat the Pan Properly
Place a large nonstick skillet or cast-iron pan over medium-high heat.
Add 2 tablespoons of oil and allow it to heat until shimmering.
A properly heated pan is essential for achieving crispy edges.
Do not rush this step.
Pour and Spread the Batter
Once the oil is hot, pour the batter into the center of the pan.
Use a spatula to spread it into a thin, even circle, about ¼ to ½ inch thick.
Thinner pancakes crisp up better than thick ones.
If needed, drizzle a little extra oil around the edges.
Cook Until Crispy
Let the pancake cook undisturbed for 3–4 minutes.
You’ll see the edges begin to crisp and brown.
Peek underneath with a spatula—the bottom should be golden and firm before flipping.
Flip carefully in one confident motion.
Cook the second side for another 3–4 minutes until crisp and deeply golden.
Press lightly with a spatula to encourage even browning.
Drain and Rest Briefly
Transfer the finished pancake to a wire rack or paper towel-lined plate.
Let it rest for 1–2 minutes to maintain crispness.
Avoid stacking pancakes directly on top of each other, as steam can soften them.
Slice and Serve
Use a sharp knife or kitchen scissors to cut the kimchijeon into wedges or squares.
Serve immediately while hot and crispy.
Traditionally, it’s enjoyed with a simple dipping sauce made from:
- 2 tablespoons soy sauce
- 1 teaspoon rice vinegar
- ½ teaspoon sesame oil
- A pinch of sugar
- Optional sliced green onions or chili flakes
Dip lightly to complement the bold kimchi flavor.
Tips for Extra Crispiness
- Use cold water in the batter.
- Add cornstarch for crunch.
- Don’t overcrowd the pan.
- Cook over medium-high heat.
- Add enough oil—this is not a low-fat dish.
The combination of oil and high heat creates that irresistible crispy exterior.
Customization Ideas
Kimchijeon is incredibly versatile.
Try adding:
- Thinly sliced onions for sweetness
- Seafood like squid or shrimp
- Thin pork belly slices for richness
- A sprinkle of mozzarella for a modern twist
Each variation brings a unique spin while keeping the base recipe intact.
Make-Ahead and Storage
Kimchijeon is best eaten fresh.
However, leftovers can be stored in the refrigerator for up to 2 days.
Reheat in a dry skillet over medium heat to re-crisp.
Avoid microwaving if possible, as it softens the texture.
Final Thoughts
Kimchijeon is proof that simple ingredients can create bold, unforgettable flavors.
The tangy heat of fermented kimchi combined with a crispy, golden batter creates a dish that’s both comforting and exciting.
It’s quick, affordable, and deeply satisfying—perfect as a snack, side dish, or even a light meal.
Once you master the technique of achieving that crispy exterior, you’ll find yourself making it again and again.
Crunchy on the outside, tender and flavorful inside, and packed with that signature kimchi kick—this homemade kimchijeon delivers everything you love about Korean comfort food in one irresistible pancake.