

If you need a guaranteed hit for game day, holiday gatherings, or a simple weeknight dinner, these ham and cheese sliders are exactly what you’re looking for.
Soft, pillowy rolls layered with savory ham and gooey melted cheese, brushed with a buttery glaze, and baked until golden—this is comfort food at its best.
The best part?
This easy ham and cheese sliders method requires minimal prep and delivers maximum flavor.
Whether you’re feeding a crowd or just want something warm and satisfying, this ham and cheese sliders recipe will quickly become a go-to favorite.
Let’s walk through it step by step so you get perfectly melty, buttery sliders every time.
Why You’ll Love This Recipe
- Quick and simple to prepare
- Perfect for parties or meal prep
- Gooey, melty cheese in every bite
- Make-ahead friendly
- Customizable with different cheeses or toppings
These sliders are the definition of effortless comfort food.
Simple ingredients, big flavor payoff.
Preheat and Prepare the Baking Dish
Preheat your oven to 350°F (175°C).
Lightly grease a 9×13-inch baking dish or line it with parchment paper for easy cleanup.
Proper preparation ensures the sliders bake evenly and don’t stick.
Slice the Rolls
Without separating the individual rolls, use a serrated knife to slice the entire slab of rolls horizontally.
Keep the tops and bottoms intact as single layers. This makes assembly quick and keeps everything aligned.
Place the bottom half into the prepared baking dish.
Layer the Ham
Evenly layer the sliced ham over the bottom half of the rolls.
Fold the ham slightly if needed to create even coverage and height. Generous layering ensures every slider has plenty of savory flavor.
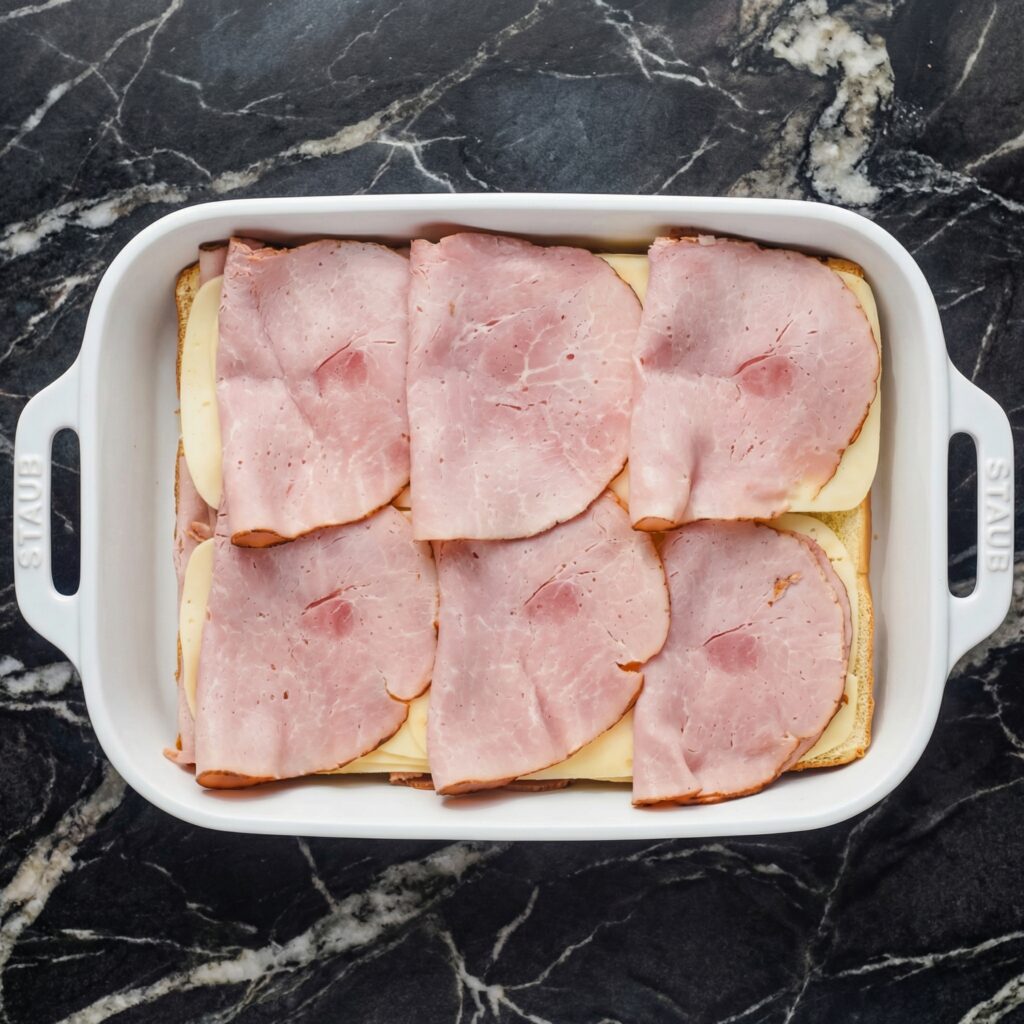
Add the Cheese
Place the Swiss cheese slices evenly over the ham.
You can overlap slices slightly to ensure full coverage. When baked, the cheese melts beautifully and binds the layers together.
If you prefer a sharper flavor, try cheddar or provolone. This ham and cheese sliders recipe is flexible and forgiving.
Replace the Tops
Carefully place the top half of the rolls back over the layered ham and cheese.
Press down gently to compact everything slightly.
At this point, your sliders are assembled and ready for their buttery finish.
Prepare the Glaze
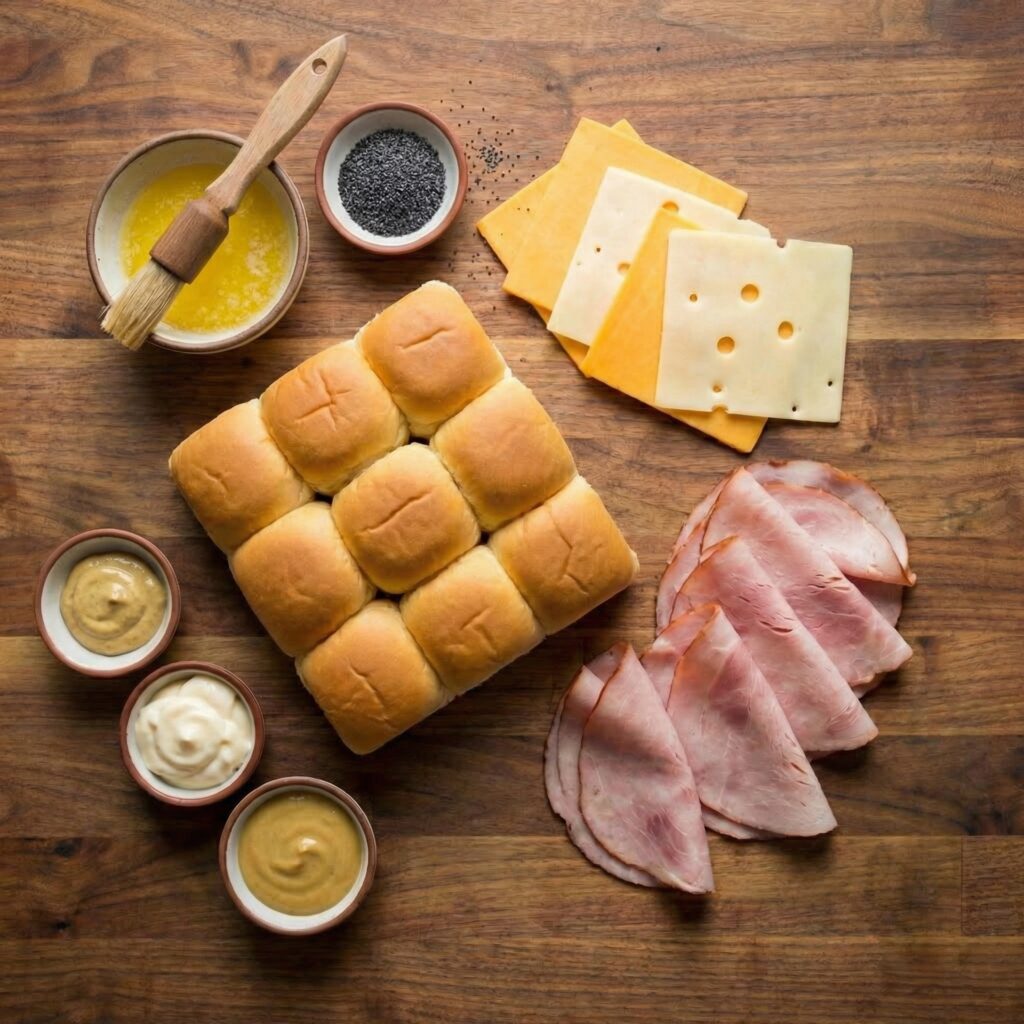
In a small bowl, whisk together melted butter, Dijon mustard, Worcestershire sauce, garlic powder, onion powder, poppy seeds, and dried parsley.
This glaze is what transforms simple sandwiches into truly irresistible easy ham and cheese sliders.
The mayonnaise adds richness, while the mustard and Worcestershire bring tangy depth.
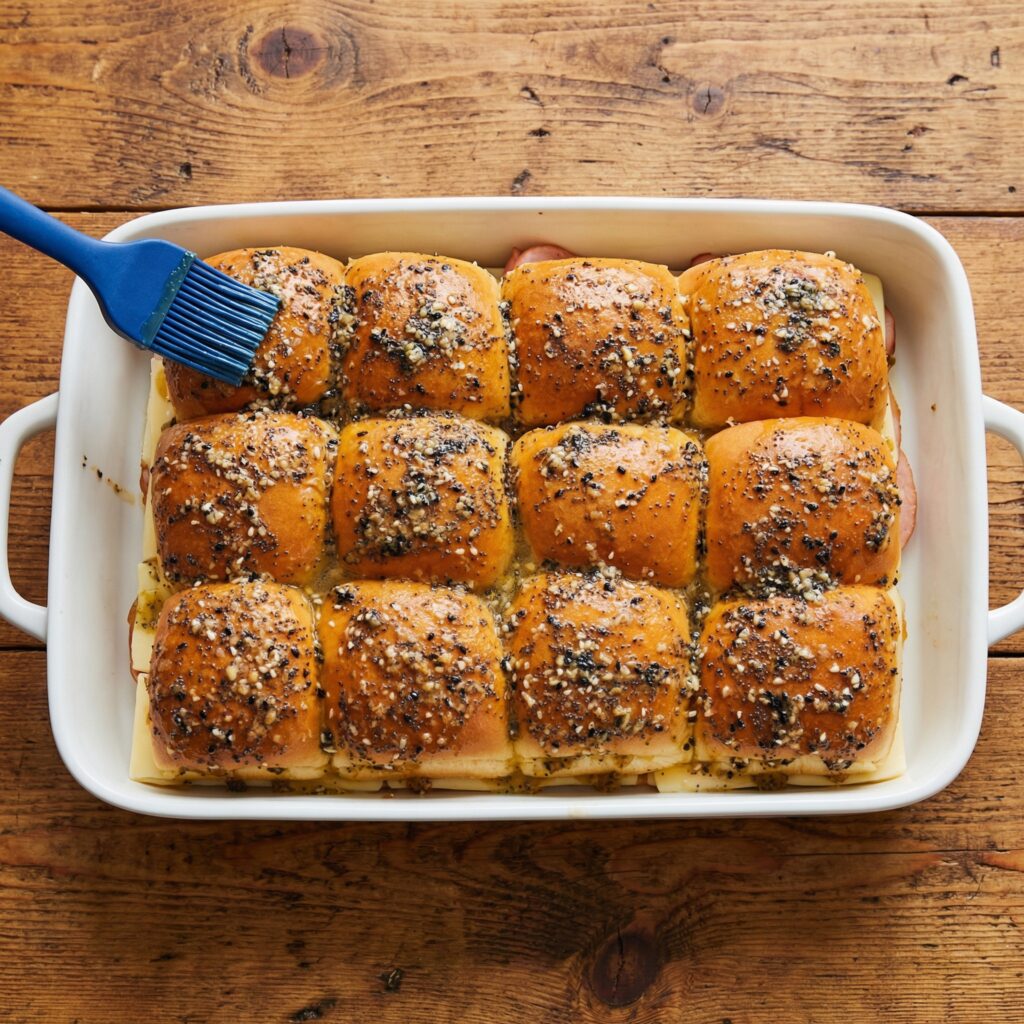
Brush Generously
Using a pastry brush, generously coat the tops of the rolls with the butter mixture.
Be sure to get into the creases and edges so the flavor seeps down into the layers.
For maximum flavor, let the sliders rest for 5–10 minutes before baking. This allows the glaze to soak into the bread.
Cover and Bake
Cover the baking dish loosely with foil.
Bake for 15 minutes to allow the cheese to melt and the flavors to meld.
After 15 minutes, remove the foil and bake for an additional 5–7 minutes, or until the tops are golden brown and slightly crisp.
The tops should look glossy and lightly toasted.
Cool Slightly and Slice
Remove from the oven and let cool for 5 minutes.
Use a sharp knife to cut along the roll lines, separating into individual sliders.
The cheese should be perfectly melted and slightly stretchy when pulled apart.
Serve and Enjoy
Serve warm for best results.
These ham and cheese sliders pair perfectly with chips, coleslaw, a simple salad, or even a bowl of soup.
They’re ideal for potlucks, tailgates, brunch spreads, or quick family dinners.
Tips for Perfect Sliders
- Don’t skip covering with foil first—this prevents over-browning before the cheese melts.
- Use thinly sliced deli ham for easy layering.
- Let the butter mixture soak in before baking.
- For extra crisp tops, broil for 1–2 minutes at the end (watch closely).
Small details make these sliders truly special.
Make-Ahead Instructions
You can assemble the sliders up to 24 hours in advance.
Cover tightly and refrigerate. When ready to bake, pour the butter glaze over the top and bake as directed.
This makes them ideal for entertaining or busy schedules.
Flavor Variations
Want to switch things up?
- Add a layer of caramelized onions for sweetness.
- Spread a thin layer of mayo or honey mustard inside.
- Use smoked gouda for deeper flavor.
- Add a pinch of red pepper flakes to the butter mixture for heat.
This base ham and cheese sliders recipe is incredibly adaptable.
Storage and Reheating
Store leftovers in an airtight container in the refrigerator for up to 3 days.
Reheat in a 325°F (165°C) oven for 8–10 minutes until warmed through.
Avoid microwaving if possible, as it can make the bread soggy.
Final Thoughts
These easy ham and cheese sliders prove that simple ingredients can create something truly memorable. Soft rolls, savory ham, melty cheese, and a buttery glaze combine into a dish that’s comforting, satisfying, and endlessly crowd-pleasing.
Whether you’re making them for a celebration or just because, this dependable ham and cheese sliders recipe delivers every time. Warm, cheesy, and packed with flavor, these sliders are guaranteed to disappear fast.
Make one batch—and don’t be surprised when everyone asks for the recipe.