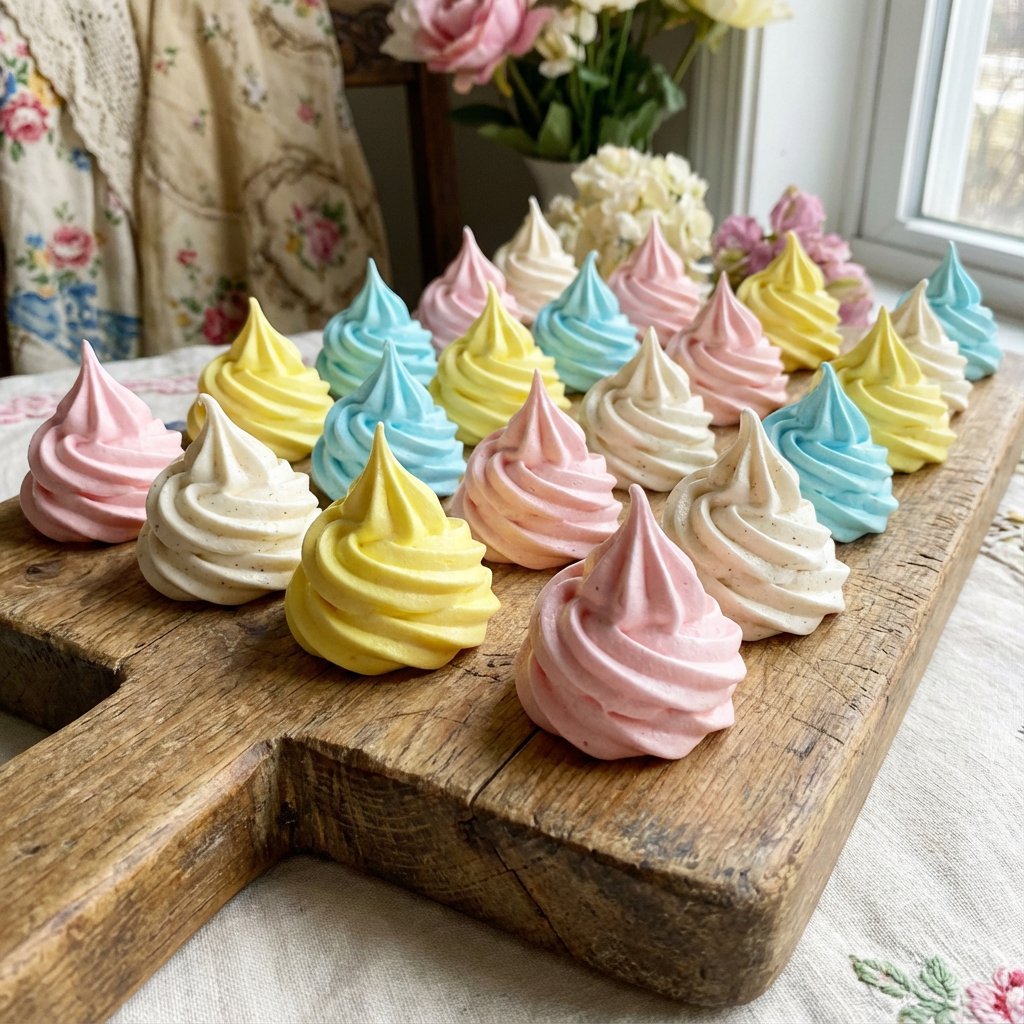
Transform simple egg whites and sugar into edible clouds of sweetness. Meringue Kisses are the epitome of an elegant yet simple treat—crisp on the outside, slightly chewy within, and they literally melt on your tongue.
With just three core ingredients and a piping bag, you can create stunning, bite-sized confections perfect for baby showers, Easter, Christmas, or as a delicate accompaniment to afternoon tea. The process is a delightful lesson in pastry science, and the result is a gluten-free, fat-free cookie that feels both fancy and fun. Mastering these kisses unlocks a world of decorative possibilities for your dessert table.
The Science of Stable, Glossy Meringue
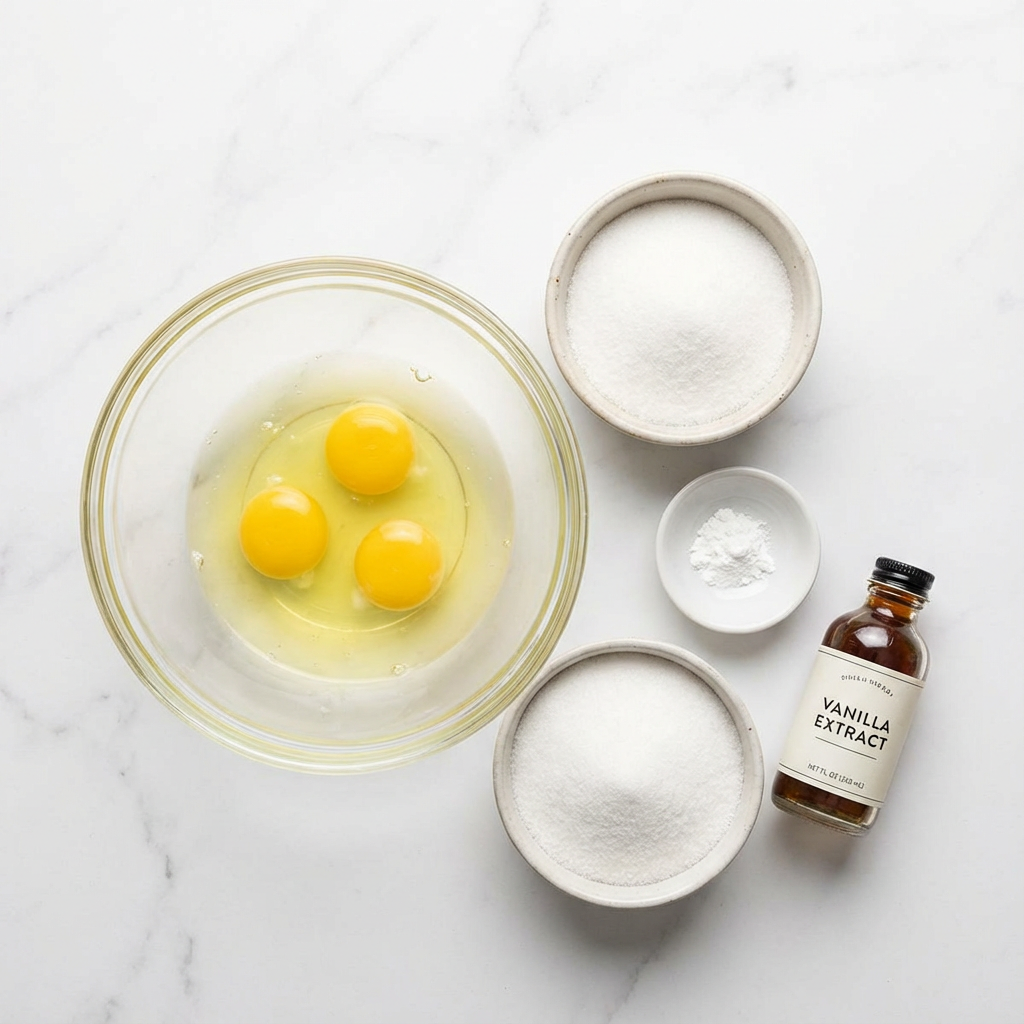
The entire structure of a meringue kiss is built on the power of whipped egg white proteins. When egg whites are beaten, their proteins unravel and form a network that traps air bubbles, creating foam. Adding granulated sugar is a two-part process: it stabilizes the foam by dissolving into the egg white’s water, creating a thick syrup that coats the air bubbles, and it adds sweetness.
The key to a stiff, glossy meringue that holds intricate piped shapes is patience. Adding the sugar gradually ensures it dissolves completely; undissolved sugar will weep or create a gritty texture. The low-and-slow baking (or really, drying) process at around 200°F (95°C) is crucial—it gently evaporates the moisture from the meringue over 1-2 hours without browning it, leaving behind a crisp, airy shell. Understanding this balance of air, sugar, and gentle heat is the secret to perfect kisses.
Instructions
Prep
Preheat oven to 200°F (95°C). Line two large baking sheets with parchment paper. Fit a piping bag with a large open star tip (like Ateco 846 or 829).
Start Whipping
In a spotlessly clean, grease-free bowl, combine egg whites and cream of tartar (if using). Using an electric mixer with a whisk attachment, beat on medium speed until the mixture becomes foamy and soft peaks form.
Add Sugar Gradually
With the mixer on medium-high speed, begin adding the sugar, about 1 tablespoon at a time, allowing each addition to incorporate fully before adding the next. This should take 2-3 minutes total.

Whip to Stiff, Glossy Peaks
Once all sugar is added, increase speed to high and continue beating for 4-6 more minutes, until the meringue is very thick, glossy, and holds a very stiff peak when the whisk is lifted. The meringue should not slip if the bowl is tipped. Beat in vanilla extract, if using.
Color & Pipe
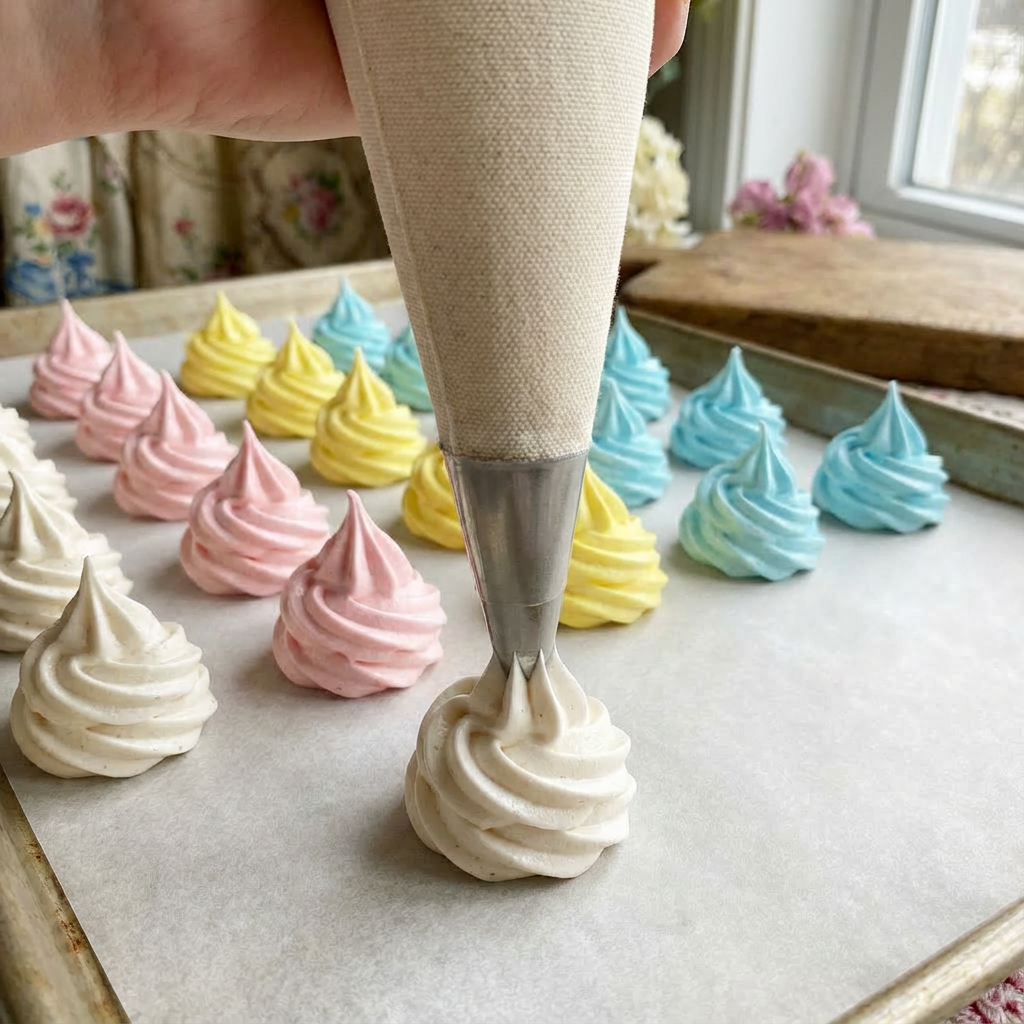
If coloring, divide the meringue into bowls and tint with gel food coloring (liquid coloring will dilute the meringue). Transfer meringue to the piping bag. Pipe 1-inch tall “kisses” onto the prepared sheets by holding the bag perpendicular, squeezing firmly, then pulling up quickly to create a peak. Space them about 1 inch apart.
Dry/Bake
Place sheets in the oven. Bake for 1.5 to 2 hours. The meringues are done when they are completely dry, firm to the touch, and can be easily lifted off the parchment. They should not color. Turn off the oven and let them cool inside with the door slightly ajar for 1 hour.
Store
Once completely cool, store immediately in an airtight container at room temperature for up to 2 weeks. Humidity is their enemy.
Pro-Tips for Foolproof, Beautiful Meringues
- Absolute Cleanliness: Any trace of fat (yolk, oil) in the bowl or on the beaters will prevent the whites from whipping properly. Wipe utensils with lemon juice or vinegar to ensure they’re grease-free.
- Room Temperature Eggs: This is non-negotiable for maximum volume.
- Superfine Sugar: For the smoothest texture, use superfine (caster) sugar, or pulse regular granulated sugar in a food processor for 30 seconds.
- Stiff Peak Test: The meringue is ready when you can hold the bowl upside down over your head without it moving.
- Use Gel Coloring: Liquid food coloring adds moisture and can deflate your meringue. Gel or paste colors are highly concentrated and won’t affect the texture.
- Low & Slow Drying: Do not increase the oven temperature to speed things up. This will cause browning, cracking, or a hollow interior.
- Humidity Warning: Avoid making meringues on rainy or very humid days, as they will absorb moisture from the air and become sticky.
These Meringue Kisses are a delightful, elegant project with a deliciously sweet reward.